Template Editing Guide for Word & Publisher
Quick, helpful instructions for editing StockLayouts templates in Microsoft Office.
How to add your own text
StockLayouts templates include text boxes filled with placeholder text and suggested
copy content for heads and subheads. The text has been carefully formatted and placed
in the document to make it easy to customize. Use any of the copy content and edit
it in any way you like. To edit text, simply click on it, select it and replace
it with your own. Insert a new text box, delete or duplicate an existing text box
and layer text boxes on top of one another to achieve special graphic effects.
Replacing placeholder text
Click on the text box, select the "Latin" placeholder text within it and replace it with your own. Resize
the text box as needed to accommodate your copy.
Inserting a new text box
- On the Insert tab, in the Text group, click Text Box, and then select click Draw Text Box
- Drag to draw the text box the size that you want.
- To add text, click inside the box and type or your paste text.
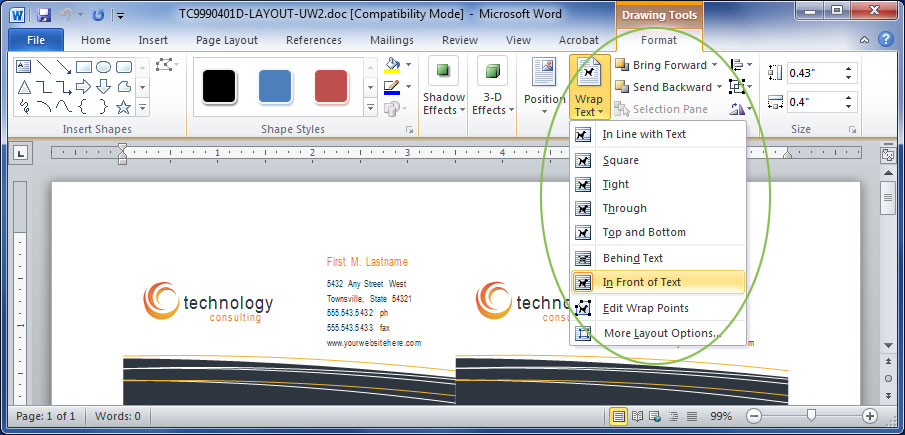
Changing the wrapping style of a text box
Change the wrapping style of a text box to freely place it on the page and to layer
it in front of or behind others.
- Select the text box you want to change.
- On the Format tab, in the Arrange group, click Wrap Text, and then select In Front of Text.
- Move the text box where you want.
Change the wrapping style of a text box
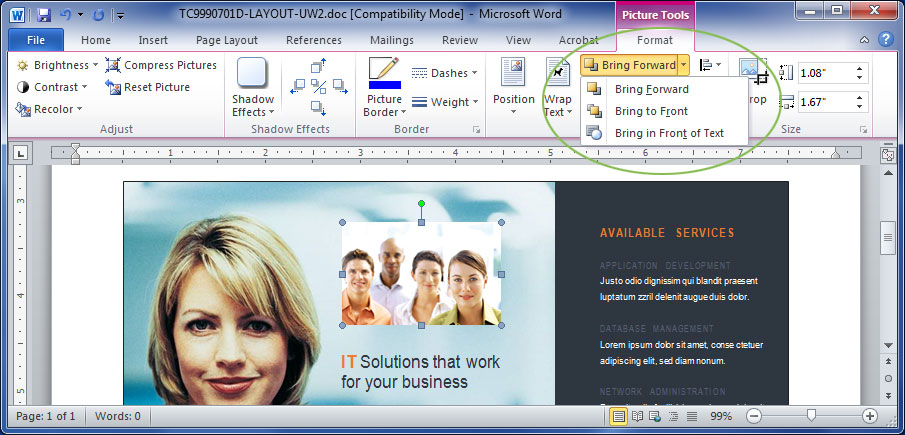
Moving a text box forward or backward
Layer text boxes on top of one another to create special effects.
- Select the text box you want to move forward or backward.
- On the Format tab, in the Arrange group, select Bring Forward, Send Backward, Bring to Front, or Send to Back.
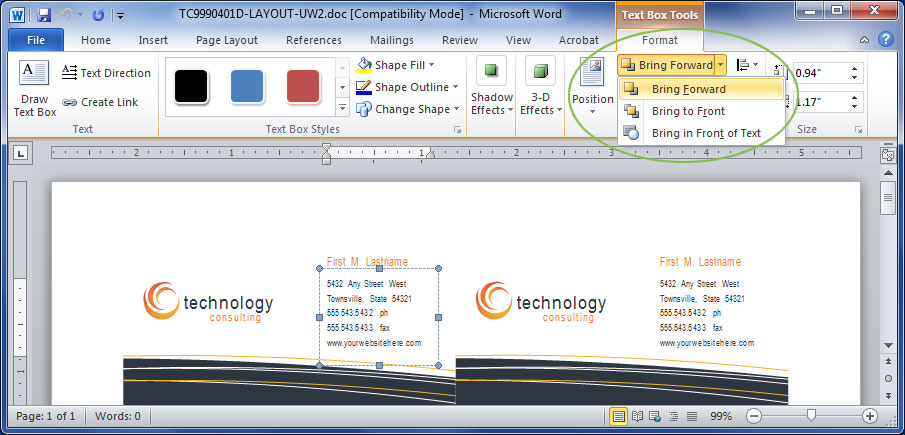
Move a text box forward or backward
How to change font, size and style of text
Font, size, style and color of text has been pre-formatted in the document. Standard
fonts, New Times Roman and Arial, are used to demonstrate the suggested style and
size of type. Special effects, like expanding or condensing text and increasing
or decreasing character spacing, are also used. Keep the existing text treatments
or further customize your design project by changing the fonts and special effects
to suit your needs.
Applying a different font to text
- Select the text you want to change.
- On the Home tab, in the Font group, select a font name in the Font box.
Changing the size of text
- Select the text you want to change.
- On the Home tab, in the Font group, type or select a point size in the Font Size box.
For example, type 10.5.
Increasing or decreasing space between characters
- Select the text you want to change.
- On the Home tab, in the Font group, click the Font Dialog Box Launcher, and then click the Advanced tab.
- In the Spacing box, enter the value you want.
Condensing or expanding text
- Select the text you want to change.
- On the Home tab, in the Font group, click the Font Dialog Box Launcher, and then click the Advanced tab.
- In the Scale box, enter the percentage you want.
Changing the color of text
- Select the text you want to change.
- On the Home tab, in the Font group, click the arrow next to Font Color, and then select the color that you want.
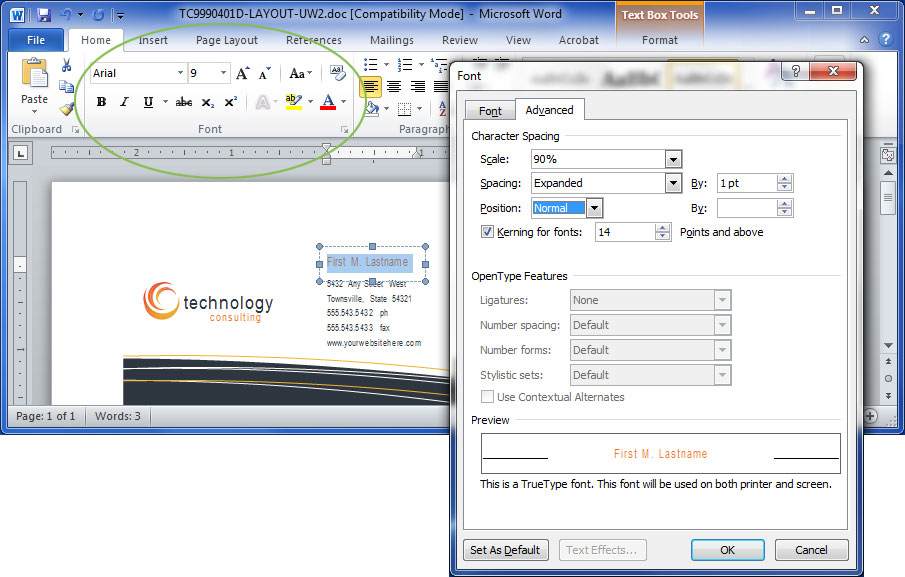
Change font, size and style of text
How to add your own pictures and logo
The templates include carefully selected high quality stock photos, original graphic
elements and logo artwork. Some pictures and graphics are layered on top of one
another to produce artistic results. Insert your own pictures, clip art and graphic
shapes, or cut and paste from other StockLayouts templates. Use the existing logo
design, customize it, or replace it with your own.
Replacing an existing picture in the template
Note: First, see instructions for converting document to current version of Word.
- Click on the picture you want to replace in the template.
- On the Picture Tools, Format tab, click Change Picture.
- Browse to locate the picture you want to insert.
- Double-click the picture that you want to insert.
Note: You may need to resize or crop the new picture to fit the space.
Inserting a new picture from a file
- Click where you want to insert the picture in your document.
- On the Insert tab, in the Illustrations group, click Picture.
- Browse to locate the picture you want to insert. For example, you might have a picture file located in My Documents.
- Double-click the picture that you want to insert.
Note: In Word, pictures are inserted at the top left corner of the page. The picture
may be hidden behind another graphic. To select the picture, move graphics on top
out of the way and change its wrapping style. (see instructions below).
Changing the wrapping style of a picture
Change the wrapping syle of a picture to freely place it on the page and to layer
it in front or behind others.
- Select the picture you want to change.
- On the Format tab, in the Arrange group, click Wrap Text, and then select In Front of Text.
- Move the picture where you want.
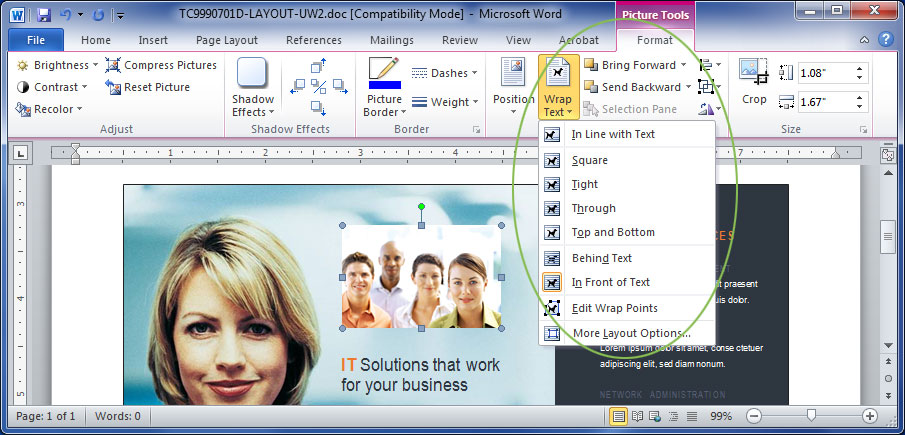
Change the wrapping style of a picture
Selecting graphics placed behind other graphics
Graphics used in the layout file may be layered on top of one another. Click the
graphic on top and drag it out of the way to select the graphic behind. Or, change
the layer order of the graphic by moving it forward or backward. (see instructions
below).
Moving a graphic forward or backward
Layer graphics on top of one another to create artistic effects.
- Select the graphic you want to move forward or backward.
- On the Format tab, in the Arrange group, select Bring Forward, Send Backward, Bring to Front, or Send to Back.
Move a graphic or picture forward or backward
Editing pictures, shapes and graphics
StockLayouts templates use pictures and graphics that have been precisely
produced using an artistically selected color palette. In Microsoft Office, pictures
are photos that were created from another file and inserted into the
document. Shapes and clip art are graphics generated within Word or Publisher. Formatting
and editing options vary depending on the type of picture or graphic you’re
working with.
Grouping and ungrouping objects
Text and graphics may be grouped. To edit graphics individually, first ungroup them.
To ungroup objects:
- Select the object you want to ungroup.
- On the Format tab, in the Arrange group, click the Group icon, then select Ungroup.
To group objects:
- Select the objects you want to group. Shift-click to select multiple objects.
- On the Format tab, in the Arrange group, click the Group icon, then select Group.
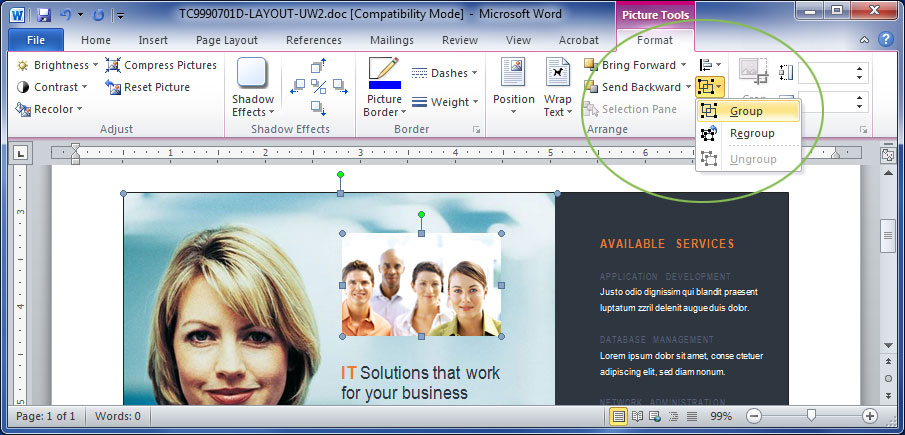
Group or ungroup objects
Resizing a picture
- Select the picture you want to resize.
- Position the mouse pointer over one of the sizing handles.
- Drag the sizing handle until the object is the shape and size you want. To maintain
the object's proportions, drag one of the corner sizing handles.
Cropping a picture
- Select the picture you want to crop.
- On the Format tab, in the Size group, click Crop.
- Position the cropping tool over a cropping handle and drag the handle inward until the object is cropped the way you want it.
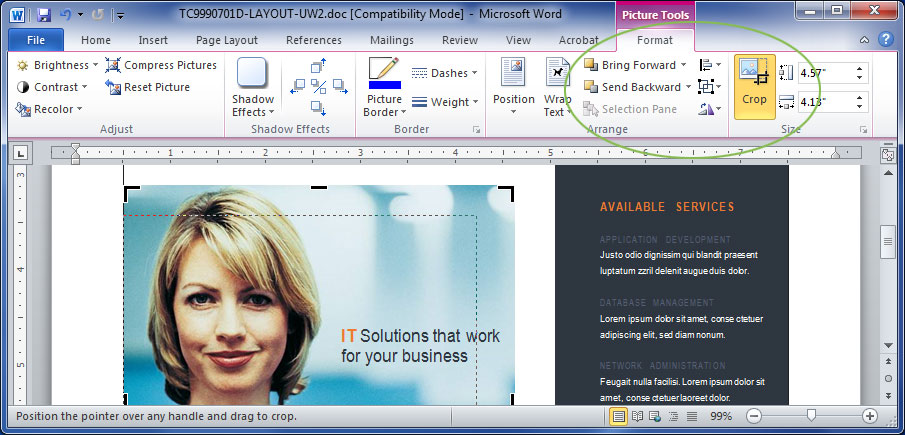
Crop a picture
Advanced formatting of a picture or graphic
Formatting options vary depending on the type of graphic you are editing.
Formatting pictures:
Pictures can be resized, cropped, and color adjusted using
brightness and contrast, converting color to black and white or grayscale.
Formatting graphics:
Graphics can be resized, rotated, flipped, and colored. Add borders, patterns and other effects.
To format a picture or graphic:
- Select the picture or drawing object you want to edit.
- On the Format tab, click the editing option you would like to use.
Additional Microsoft Office Help and Resources
For help while using any Microsoft Office program, press F1.
Click the question mark [?] in the upper right corner of any Office program.
Find help and support for Office 365, Office 2013, Office 2010, and Office 2007 at Microsoft.com.
Find hundreds of free templates for Microsoft Office applications at Office Online